
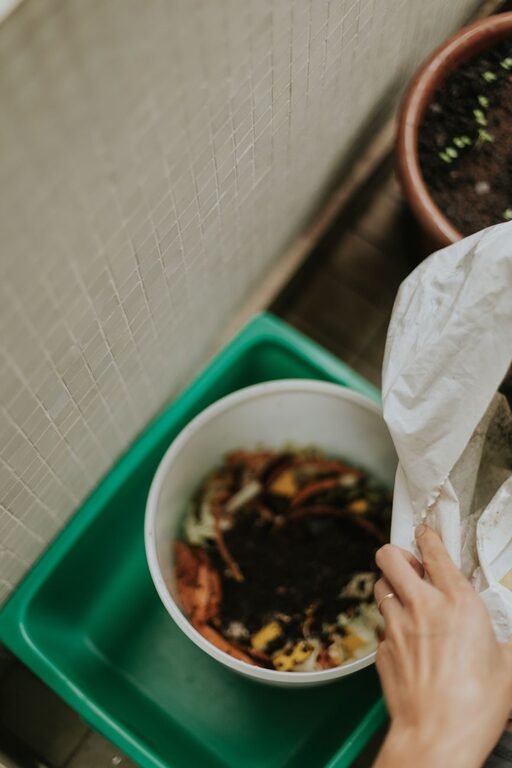
Composting at home is a simple way to turn everyday food scraps and yard waste into a useful soil amendment. Instead of sending certain organic materials to the trash, you can let them break down naturally and create compost for gardens, flower beds, houseplants, and lawns.
Starting a compost pile does not require a large yard or expensive equipment. With the right container, a balanced mix of materials, and a little patience, beginners can build a composting routine that fits their space and lifestyle.
What Is Composting?
Composting is the natural process of breaking down organic materials into a dark, crumbly material called compost. Microorganisms, insects, fungi, air, and moisture all help transform kitchen and yard waste over time.
Finished compost can improve soil structure, help retain moisture, and add organic matter. It is often called “black gold” by gardeners because of its rich texture and many practical uses.
Choose a Composting Method
The best composting method depends on your available space, the materials you have, and how much effort you want to put in.
Outdoor Compost Bin
An outdoor bin is a popular choice for people with a yard. You can purchase a commercial compost tumbler or build a simple container from wood, wire, or recycled materials.
Look for a location that is:
– Easy to reach throughout the year
– Close to your kitchen or garden
– Well-drained
– Partly shaded
– Protected from strong winds
A little sunlight can help warm the pile, but too much direct sun may dry it out.
Compost Tumbler
A tumbler is a raised container that rotates. Turning the container mixes the materials and adds air, which can speed up decomposition. Tumblers are often neat and convenient, but they may hold less material than a traditional pile.
Indoor Worm Composting
Worm composting, also called vermicomposting, uses special composting worms to break down food scraps in a container. This method works well for apartments, balconies, and small homes.
Worm bins require a suitable bedding material, gentle care, and protection from extreme temperatures. They are a good option if you want to compost indoors, but they need a little more attention than a basic outdoor pile.
Community Composting
If home composting is not practical, look for a local community garden, collection program, or neighborhood compost service. These programs may accept food scraps and other organic materials that you cannot process at home.
Learn the Difference Between Green and Brown Materials
A healthy compost pile needs a mix of “green” and “brown” materials.
Green Materials
Green materials are generally moist and rich in nitrogen. They help provide the nutrients microorganisms need to grow and work.
Common examples include:
– Fruit and vegetable scraps
– Coffee grounds and paper coffee filters
– Fresh grass clippings
– Soft plant trimmings
– Tea leaves and some paper tea bags
– Fresh weeds without mature seeds
Brown Materials
Brown materials are usually dry and rich in carbon. They add structure and help air move through the pile.
Common examples include:
– Dry leaves
– Small twigs
– Untreated wood chips
– Shredded plain paper
– Plain cardboard
– Straw
– Dry plant stems
A simple approach is to add roughly two or three parts brown materials for every one part green material by volume. You do not need to measure every addition. If the pile is wet or smells unpleasant, add more brown materials. If it is dry and barely changing, add more green materials and a small amount of water.
What You Can Compost
Many common household and yard materials can go into a home compost pile.
Good choices include:
– Fruit and vegetable scraps
– Eggshells, crushed into smaller pieces
– Coffee grounds and paper filters
– Tea leaves
– Dry leaves
– Grass clippings
– Small amounts of plain paper and cardboard
– Untreated sawdust
– Plant trimmings
– Stale bread and grains in small amounts
Cut larger scraps into smaller pieces when possible. Smaller pieces have more surface area, allowing microorganisms to break them down more quickly.
What to Keep Out of a Beginner Compost Pile
Some materials can attract pests, create odors, or break down slowly. Unless you are using a specialized composting system, avoid adding:
– Meat, fish, and bones
– Dairy products
– Oily or greasy foods
– Pet waste
– Diseased plants
– Weeds with mature seeds
– Treated or painted wood
– Glossy paper
– Coal or charcoal ash
– Large branches
– Plastic, glass, and metal
Some advanced composting systems can handle materials such as meat or pet waste, but these methods require careful temperature control and management. A basic home pile is easier to maintain when you stick to plant-based scraps and common yard materials.
Build Your Compost Pile
Start with a layer of coarse brown material, such as small twigs or dry stems. This helps air enter from the bottom of the pile. Add alternating layers of green and brown materials, or mix them as you go.
Try to keep the pile moderately moist. It should feel similar to a wrung-out sponge: damp but not dripping wet. If the pile is too dry, add a little water while mixing it. If it is too wet, add dry leaves, shredded cardboard, or another brown material.
Air is also important. Turn the pile every week or two with a garden fork, shovel, or the handle of a compost tumbler. Turning moves oxygen into the center and helps prevent compacted, smelly areas.
How to Prevent Bad Odors
A well-managed compost pile usually has an earthy smell. Strong odors often indicate that the pile is too wet, too compacted, or overloaded with green materials.
To correct common problems:
– Add dry leaves or shredded cardboard to a wet pile.
– Turn the pile to improve airflow.
– Bury fresh food scraps under a layer of brown material.
– Avoid adding large amounts of one material at a time.
– Keep meat, dairy, and oily foods out of a basic pile.
– Cover exposed food scraps to discourage flies and other pests.
If animals are a concern, use a secure bin with a lid and avoid placing food scraps near the outside edges.
Be Patient and Watch for Progress
Composting takes time. Depending on the materials, weather, moisture, and how often the pile is turned, compost may take several months or longer to finish.
As the pile breaks down, it will gradually shrink. The materials will become darker, softer, and less recognizable. Finished compost should have a loose texture and a mild, earthy smell. You should not be able to identify most of the original food scraps or plant materials.
Some small pieces may remain. You can sift them out and return them to the active pile for more time.
How to Use Finished Compost
Finished compost can be added to many parts of your home garden. Mix it into garden soil before planting, spread a thin layer around established plants, or blend a small amount into potting soil.
You can also use compost to:
– Improve heavy or sandy soil
– Add organic matter to raised beds
– Support new plantings
– Refresh garden beds between seasons
– Mulch around plants
Avoid placing a thick layer directly against plant stems or tree trunks. Compost works best as part of a balanced soil-care routine rather than as a complete replacement for soil.
Start Small and Keep It Simple
The easiest way to succeed is to begin with a manageable system. Choose a bin that fits your space, learn which materials are accepted, and develop a routine for adding scraps and brown materials.
Do not worry if your first pile is not perfect. Composting is a learning process. By observing moisture, airflow, and the balance of materials, you will quickly learn what works best in your home.
With consistent care, everyday scraps can become a valuable resource for your garden while helping reduce the amount of organic waste sent to the trash.